Weekly Game Jam #264, Days 5, 6, and Postmortem
Final day of my devlog for the 264th Weekly Game Jam, covering the last two days of development and the feedback period.
By: TheHans255
8/14/2022
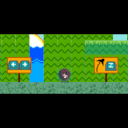
I participated in the 264th Weekly Game Jam, a recurring game jam on itch.io. The theme this week was "Many Islands". The game jam time has concluded, and here I'll be writing about my last two days working on the game and my experience publishing it and receiving feedback!
Making Sprites with Aseprite
I loved putting together the sprites for this game. Aseprite as a spriting tool is just so great to use, and it supports many different export formats that are perfect for working in Godot. There are definitely things that would improve my workflow, such as a tablet and some tools for putting together more natural color palattes, but what I had was great for the jam!
Making Tilemaps
Once I had my tilemap sprites, it was time for me to put together the actual tiles. One thing I was very glad to discover about Godot is that it has very strong tools for both creating game tilesets and painting them into levels.
Tilesets
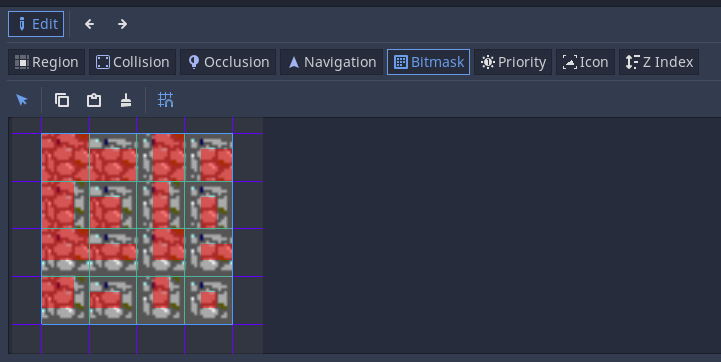
Godot supports three kinds of tiles, all three of which I used in Island Grappler: single tiles, tile atlases, and autotiles. Single tiles are the most straightforward and represent individually placed tiles in a scene, while the other two are aggregations of single tiles that are placed algorithmically while painting.

For the main platforms and obstacles - the one-way hill platforms and the cobblestone blocks - I used autotiles. Autotiles are defined as a set, and in addition to the normal properties you define on each tile, you also define a bitmask that determines which tiles to paint under which conditions. This allows you to, for instance, have tiles that naturally taper off or display borders at the ends, as my stone tiles do.
For the sand tiles, I used a tile atlas. All of these tiles were the same size and didn't have any borders to worry about (since the sloped sand tiles would take care of that), but I did want to have some randomness in how the sand was placed so it didn't all look the same.
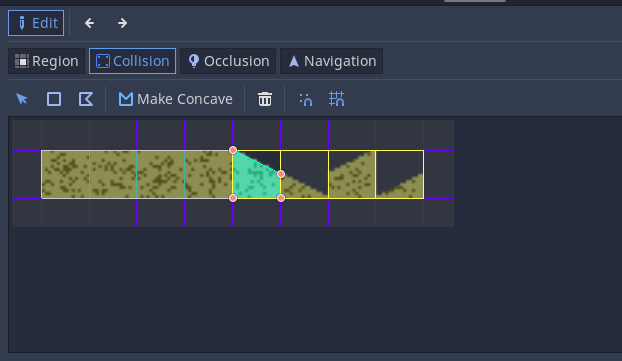
Finally, for all of my slope tiles, I used single tiles, since I only had one tile for each type and wanted to place them deliberately. Here I can highlight the ability to draw custom collision polygons for my tiles - as these tiles are slopes, the collision can match.
Of course, the custom collision feature is also available on autotiles and atlases, and the random priority feature on atlases is also available on autotiles, but I didn't use either for this game.
Tilemaps
With the tileset created, I could create tilemaps and build my islands. This is easily done in Godot with the TileMap node. After adding this node to your scene, you can select it in the editor, add the tileset to it, set the grid properties, and start painting.
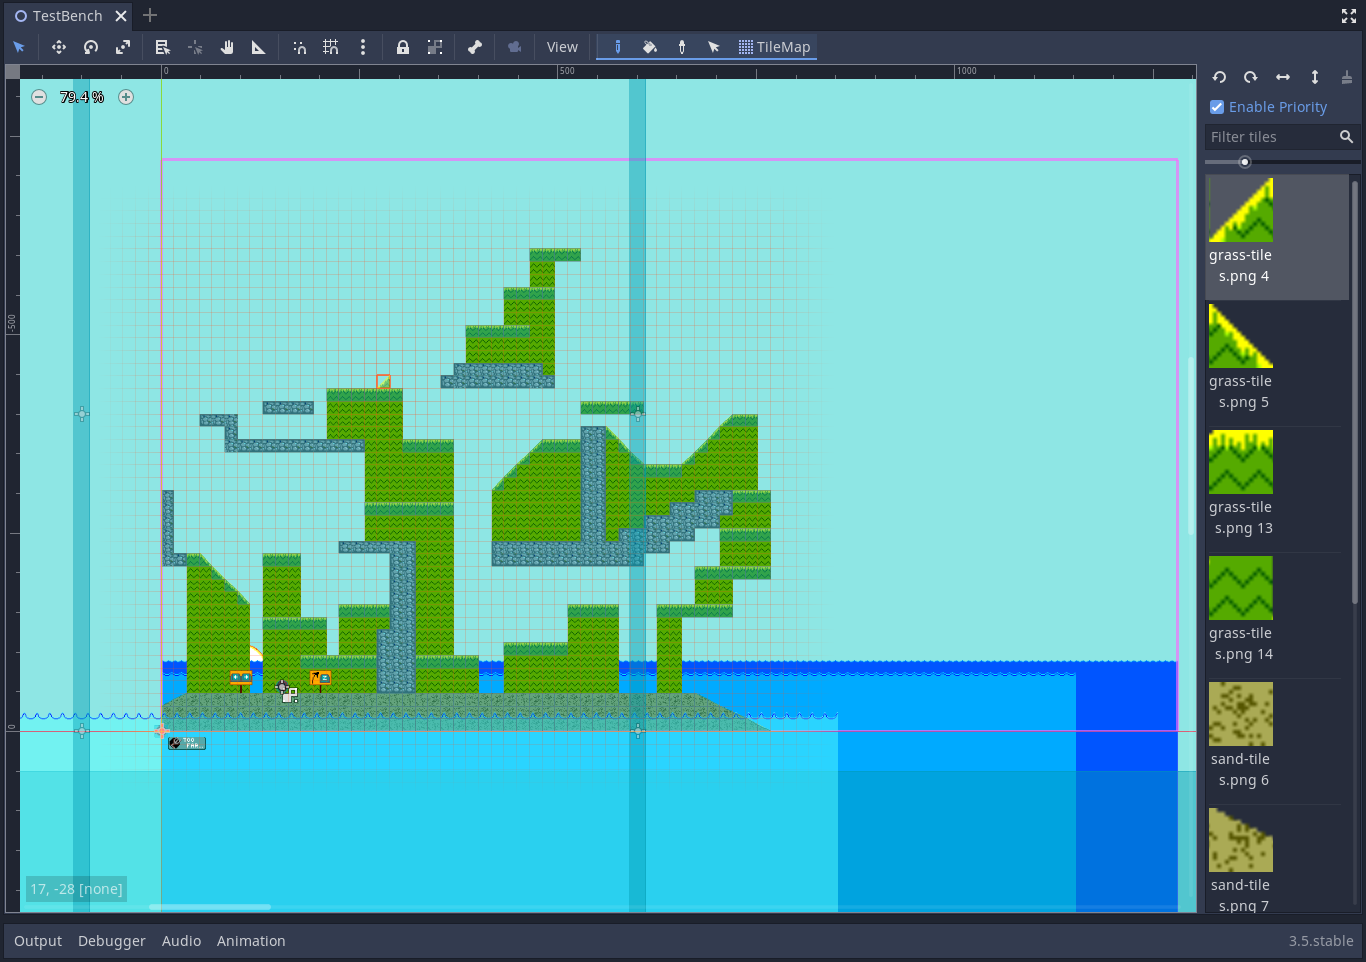
I created 5 of these tilemaps for Island Grappler, one for each island. This allows me to load islands in and out of the scene as my character approaches them, though I didn't end up doing that for the final project. Each of these tilemaps interacts with the physics system as if it was a StaticBody2D node by default, which is exactly the collision I want, though I could change it to act like a kinematic body or even make it a part of another physics object.
Player Movement
Islands are good and fun to have, but now I need a player character to traverse them. Admittedly, I did this rather sloppily: I created a single sprite as a placeholder character, and put together some basic platformer code for running and jumping. The character I ended up with was rather slippery and difficult to control, which was one of the chief complaints during review, but it's something I plan to improve.
The Grapple: Predicting The Arc
However, one thing I did spend a lot of time on was putting together the grapple/zipline. A goal that I had very early is that to go to the next island, the player would need to climb high enough to their current island such that the arc of the grapple projectile would reach far enough to the next island, so what I needed was a quick way to detect whether that was possible.
That turned out to need a lot of math, and I'm working on a blog post delving into that subject. The main idea was that I needed to calculate, given the launch velocity and starting position of the grapple projectile, if there was a valid launch angle that would hit the next island. I calculate this every frame, and if there is such an angle, I signal this to the player and allow them to use the grapple button.
Unfortunately, time constraints meant that I had to put a compromise here and make the player themselves the grapple projectile. While it works, this is definitely something I want to fix. I also had intended to allow the player to pan the camera over to their grapple target in order to move it, but that didn't end up happening either, which ended up taking a lot out of the game's strategic depth.
Water Embellishments
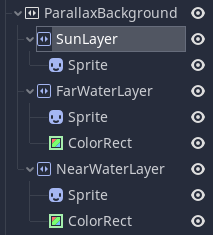
One of the last things I did before publishing was set up some water graphics for the background. Once I had drawn the tiles, this turned out to be rather easy, as Godot includes a ParallaxBackground node for automatically taking care of parallax scrolling, complete with repeating backgrounds, as the camera scrolls.
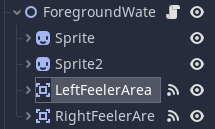
However, something I also wanted to pull off was having a layer of water in the foreground, much like the above-water levels in Super Mario World. This unfortunately can't be handled automatically with a ParallaxBackground, since those only appear behind the main scene, so I needed to create a manual solution. What I ended up doing for this was creating a foreground water object with a pair of "whiskers" that would detect the player - while there were, in reality, only two stretches of foreground water, crossing these whiskers would cause the water to movement exactly the length of one of those stretches, making it appear to the player as though nothing had changed and the water was really scrolling infinitely.
Publishing
With only half an hour left and my game in a publishable state, it was time to publish my game to itch.io and submit it to the jam!
Exporting your project in Godot for HTML is rather straightforward - go to the Export menu under Projects, install the export templates (you will get a prompt to do so), and add an HTML5 template. The default settings will work fine for itch.io, since they will cause the canvas to take up all the available space, but you can change settings such as enabling multithreading and PWA. Once you've done that, click "Export All..." and choose an export location, and you'll get a set of HTML, JS, and WASM files for your project!
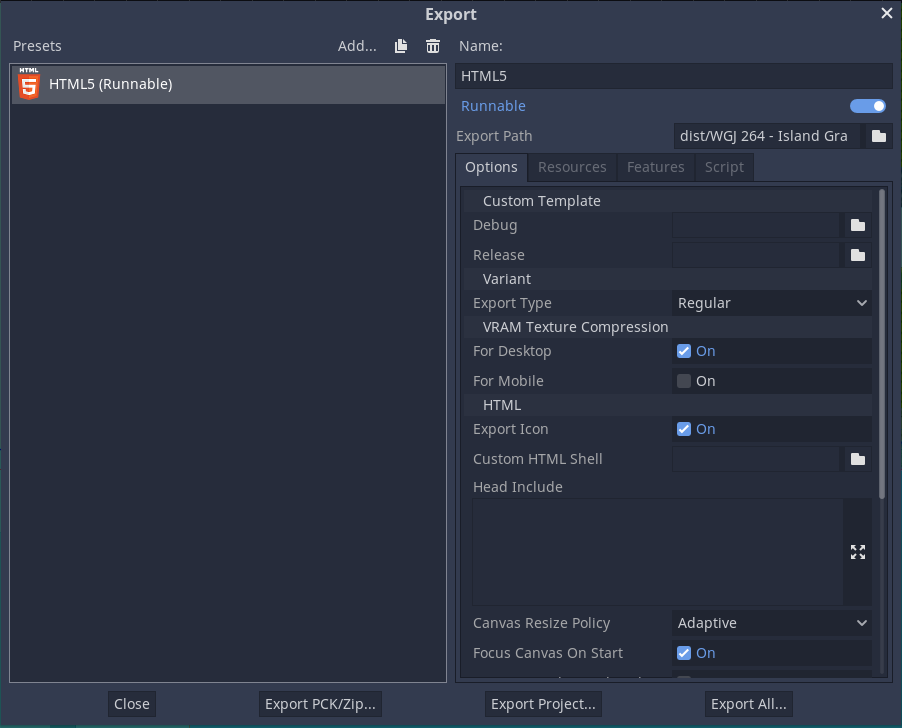
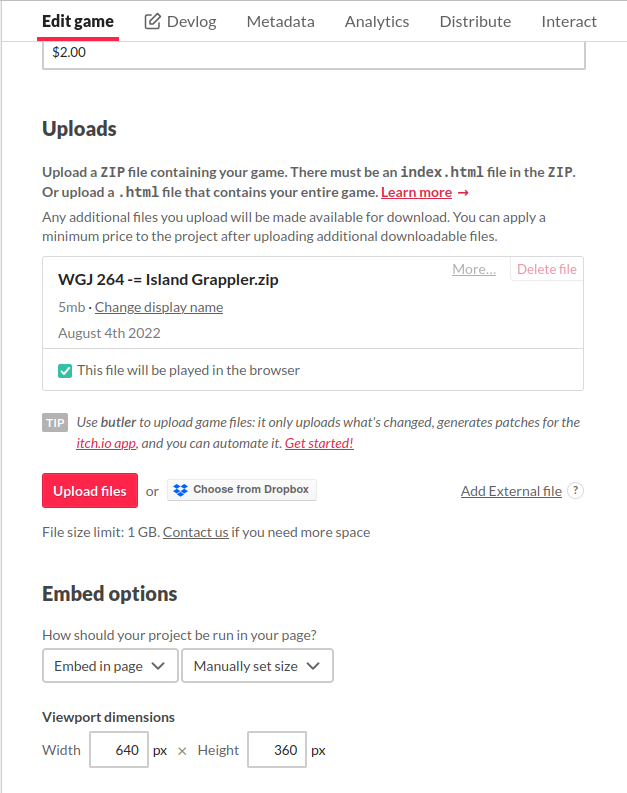
Then, for itch.io, rename the HTML file that Godot creates to "index.html", and put it all in a ZIP folder. Create an itch.io project with "Kind of project" set to HTML, put your ZIP in the Uploads section, set your game's width and height, and publish!
Play Island Grappler here
Getting Feedback
Once the game was published and submitted to the jam, it was time to start getting feedback. After getting plays from the other entrants in the jam, as well as feedback from family and friends, here were some of the general items I got:
- The movement is not good - it is very slippery and floaty. One commenter linked me to a Youtube resource about programming a tighter, more predictable jump arc, which I'll go ahead and re-link here: https://www.youtube.com/watch?v=IOe1aGY6hXA. However, one commenter praised the movement as part of the game's challenge.
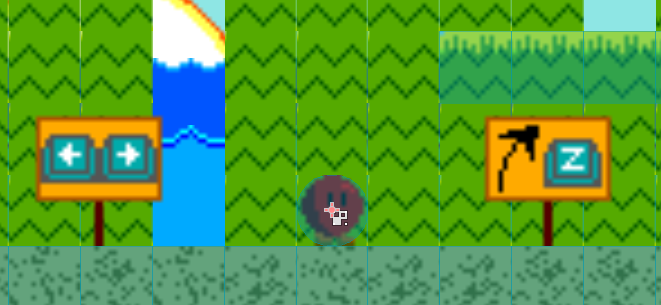
- The graphics are OK, the UI is better. One commenter mentioned that the palette could be improved to have the islands use more earthen tones, in order to contrast better with the character - in particular, the green hill tiles are both clashing with the character and wouldn't be accurate to the kinds of islands I'm building.
- A main menu would be nice, along with the ability to adjust controls (e.g. to move with A and D and jump with Space).
- The grapple is a cool idea, but could be better executed. For one, the grapple feels less like a mechanic and more like a portal to the next area, and for another, it felt random as to when the grapple was supposed to activate.
These are definitely things I want to address in future updates, not only because I want to do better, but also because I have ideas for the game, such as an entirely different main character, that I would like to implement in the future.
And that's it for the last few days and the postmortem! I'll definitely write more about my work on this game, including delving further into some development topics as well as talking future improvements. Stay tuned!